
Frigidaire Washer Troubleshooting demands strict adherence to electrical tolerances, pressure transducer frequencies, and mechanical clearances. Modern front-load and top-load units rely on synchronized sensor networks. When a single parameter drifts outside factory limits, the main control board aborts the wash cycle. This field audit manual provides exact bench specifications to isolate faults, recalibrate control modules, and verify operational limits quickly.
⚡ Quick Setup & Dial-In Summary
To troubleshoot and enter calibration mode on a Frigidaire washer, power off the display, then press Soak, Extra Rinse, and Power simultaneously once. Alternatively, hold Spin Speed and Soil Level together to access diagnostics. If fault codes E11, E21, or E32 appear, clear line obstructions and restart.
Recommended Baseline Settings for Frigidaire Washer Troubleshooting
Field technicians must verify standard operating baseline specifications before swapping components. Therefore, you should always measure baseline variables using a calibrated True-RMS multimeter. The table below details factory engineering targets across primary subsystems.
| Control / Parameter | Default Value | Recommended Calibration | Performance Impact |
|---|---|---|---|
| Inlet Valve Solenoid Resistance | 1,100 Ω ±10% | 1,050 Ω – 1,180 Ω at 72°F | Prevents slow-fill faults and E11 error triggers. |
| Pressure Sensor Frequency (Empty) | 26.5 kHz ±0.5 kHz | 26.2 kHz – 26.8 kHz zero-drum | Eliminates phantom overfill and premature drain cycles. |
| Pressure Sensor Frequency (Full) | 21.4 kHz ±0.5 kHz | 21.1 kHz – 21.6 kHz at reset level | Guarantees correct wash action and water conservation. |
| Tachometer Generator Resistance | 180 Ω ±5% | 175 Ω – 185 Ω static bench test | Stops sudden motor runaway and E52 drive dropouts. |
| Drive Motor Windings (Phase to Phase) | 5.5 Ω ±7% | 5.3 Ω – 5.8 Ω balanced across phases | Prevents motor stall errors and inverter board damage. |
| Drain Pump Motor Coil | 14.5 Ω ±10% | 13.8 Ω – 15.2 Ω at ambient | Resolves E21 drainage timeouts and pump cavity lock. |
For manufacturer tolerance limits, verify the National Institute of Standards Technical Baseline before applying aggressive offsets. Always check line supply quality before disassembling factory wire harnesses.
Executing Diagnostic Activation Sequences
Technicians must wake the central control unit to inspect live error registers. First, ensure the drum stays completely empty. In addition, close the door latch firmly to satisfy the safety interlock.
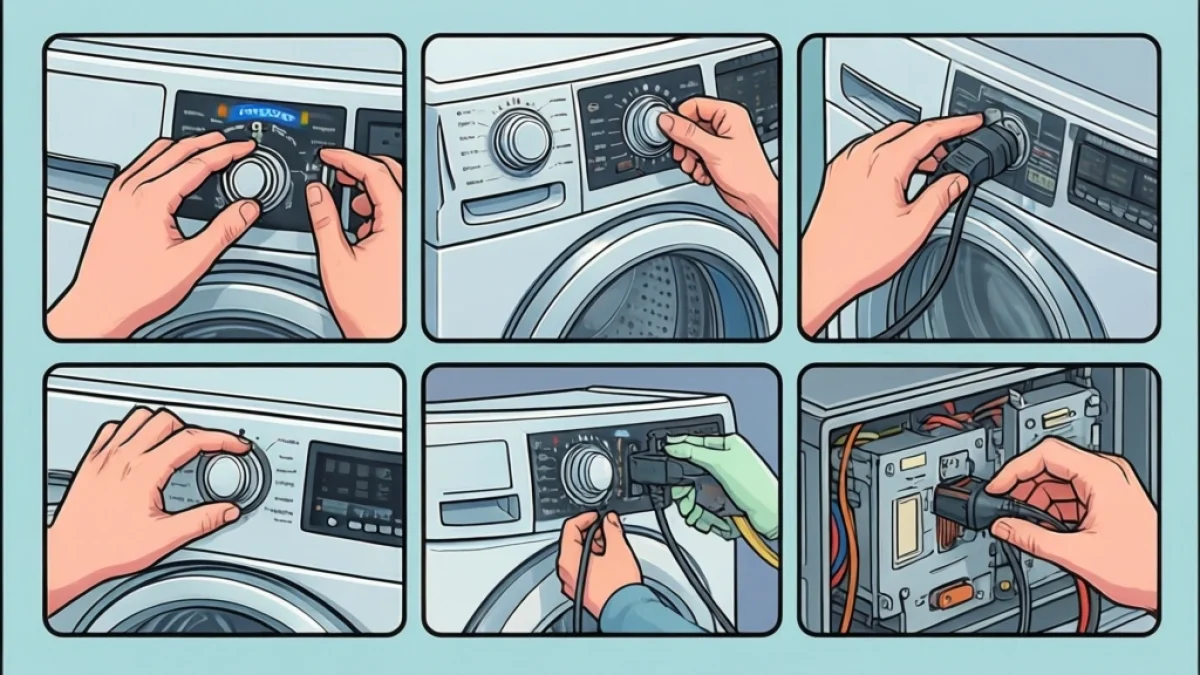
Specifically, switch the unit into standby mode by turning the cycle selector dial. Next, press and hold the Cancel and Start buttons together for five seconds. Consequently, the display will light all LEDs to confirm diagnostic initiation. However, top-load units utilize a different sequence. On rotary knob models, turn the dial counterclockwise to clear previous inputs. Then, turn the knob three clicks clockwise, one click counterclockwise, and one click clockwise. All console LEDs will flash in unison once successful.
Now, rotate the dial through individual test segments. Position 1 tests the hot water inlet circuit. Position 2 energizes the bleach dispenser valve. Position 3 tests the fabric softener valve. Next, Position 4 powers the wash motor in clockwise rotation. Position 5 checks counterclockwise agitate routines. Finally, Position 9 displays stored error codes sequentially.
Pressure Transducer Calibration and Water Level Dynamics
Water level errors account for most aborted wash operations. Modern Frigidaire assemblies abandon simple mechanical diaphragm switches. Instead, they implement dynamic frequency-based pressure transducers.
As water fills the tub, air compresses inside the transducer air dome. Consequently, the internal ferrite core shifts through an oscillator coil. This physical movement changes the output frequency linearly. For example, an empty tub transmits roughly 26.5 kHz. In contrast, a completely full tub drops the output signal to approximately 21.4 kHz. If debris coats the air bell, the signal drifts. Therefore, the control module misreads physical water depth.
First, inspect the clear vinyl transducer line for pinhole leaks or condensation. Even microscopic pinholes collapse the air cushion completely. As a result, the washer fills continuously until the emergency overflow trip trips. Remove the tube from the transducer port. Then, blow low-pressure clean air downward toward the sump assembly to purge lint. Reconnect the tube securely with a spring clamp. Finally, run an empty short cycle to allow the board to re-zero the base frequency.
Motor Drive Inverter and Tachometer Verification
The motor control inverter module governs variable drum acceleration. When the drive system fails, washers stop abruptly during the spin cycle. Consequently, the display triggers code E52 or E58.
First, isolate the motor harness connector from the main inverter board. Measure the resistance across motor terminals 1, 2, and 3 using your meter. Specifically, phase-to-phase readings must remain balanced within 0.3 ohms of each other. If any phase shows infinite resistance, replace the motor stator assembly immediately. However, if winding resistances match baseline values, inspect the tachometer sensor.
Next, connect your meter leads across the tachometer pins on the harness. Spin the drum by hand at moderate speed. The sensor should generate a continuous AC voltage pulse between 1.5 VAC and 3.5 VAC. If the output drops to zero during manual rotation, the tachometer ring is fractured. Replace the magnetic hub assembly to restore closed-loop speed tracking.
Drain System Clearance and Mechanical Head Limits
Drainage faults cause significant cycle delays. In fact, code E21 appears whenever the washer fails to evacuate water within 270 seconds. Therefore, you must methodically inspect both electrical and mechanical drain paths.
First, check the pump housing for mechanical jams. Small items frequently slip past the tub boot seal. Consequently, coins, hairpins, and lint clumps jam the impeller blades. Clean the debris trap thoroughly. Next, apply direct line voltage to the pump motor terminals during testing. The pump should evacuate water at a minimum rate of 12 gallons per minute.
In addition, measure the physical discharge loop elevation behind the cabinet. Frigidaire drain lines require an exact siphon break height. Specifically, position the drain hose discharge between 36 inches and 96 inches above finished floor height. If you install the discharge lower than 36 inches, water siphons continuously during wash cycles. Conversely, routing the line higher than 96 inches overworks the pump motor and triggers false drainage codes.
Step-by-Step Procedure to Calibrate Frigidaire Washer Troubleshooting
Clear Current Settings & Access Configuration Menu
Wake the console by pressing any button. Press Cancel twice to clear active cycle routines. Immediately press and hold Cancel and Start/Pause simultaneously for 5 seconds until all LED status lights flash. Turn the cycle selector knob clockwise until the digital readout displays 00 or enters service standby mode.
Zero-Tare the Electronic Pressure Sensor
Ensure the inner tub is completely empty of clothing and water. Navigate through the test menu by rotating the cycle selector dial clockwise to diagnostic position 03 (Water Level Sensor Test). Press Start/Pause once to engage the transducer tare routine. The display will flash CAL or 0, resetting the analog pressure sensor back to true atmospheric baseline.
Execute the Motor & Balance Calibration Sweep
Rotate the cycle dial to position 08 (Spin & Out-of-Balance Diagnostic Test). Press Start/Pause to start the drum rotation. The washer will distribute torque, ramping from 0 to 400 RPM, then accelerate toward maximum spin. Let the machine cycle through this test unassisted for 90 seconds while the control board maps the motor tachometer pulses and current draw.
Store Calibrated Values & Exit Field Service Mode
Wait until the spin test stops completely and the door lock disengages. Press and hold Cancel for 4 seconds until the control board beeps twice and returns to the normal cycle selection screen. Unplug the main power cord from the wall outlet for 60 seconds to commit the new calibration parameters into non-volatile memory (EEPROM).
Frigidaire Washer Troubleshooting Quick Diagnostic Assistant
Select the specific issue or error code to reveal verified service steps:
⚠️ Critical Misconfiguration Warning
Never initiate a pressure transducer calibration while standing water or heavy loads remain inside the wash drum. Calibrating with residual water forces the control board to read hydrostatic pressure as the empty baseline, causing severe tub overfills, pump cavitation, and water valve blowouts. Additionally, forcing a high-speed spin test on an unlevel chassis can rupture suspension dampers and destroy the outer tub assembly.
Frequently Asked Questions
What are the optimal factory default settings for Frigidaire Washer Troubleshooting?
Factory defaults run the Normal/Casual cycle with Warm wash, Cold rinse, High spin speed, and Auto-Sensing fill level. These parameters ensure optimal balance between cycle time, low mechanical stress on the spider bracket, and proper water turnover rates to prevent soap scum buildup.
How do I clear misconfigured profiles on Frigidaire Washer Troubleshooting?
Perform a hard system reset. Disconnect power at the circuit breaker or wall plug for 10 full minutes. While unplugged, press and hold the Start/Pause button for 10 seconds to discharge the main control board capacitors. Reapply power, open and close the door six times within 12 seconds to clear stuck memory profiles.
Why are custom settings not saving properly on Frigidaire Washer Troubleshooting?
Settings fail to save when users turn the cycle knob immediately after modifying modifiers like Soil Level or Spin Speed. Always wait for the LED modifier light to turn solid before pressing Start. If custom settings wipe after power drops, the onboard EEPROM chip on the main control board has corrupted and requires board replacement.
How often should Frigidaire Washer Troubleshooting be recalibrated?
Recalibrate the washer once every 12 months, or immediately after leveling the cabinet legs, moving the appliance, or replacing major components such as the motor control board, main drive belt, water level transducer, or suspension shocks.
Final Expert Recommendations
Modern Frigidaire washing machines rely heavily on micro-voltage feedback loops between the motor inverter and pressure transducer. Consistently running self-calibration diagnostics eliminates false out-of-balance errors, prevents drum seal friction, and ensures accurate fill volumes. Pair regular system calibration with routine drain filter cleanouts and chassis level checks to extend the operational lifespan of your mechanical drive assembly.